
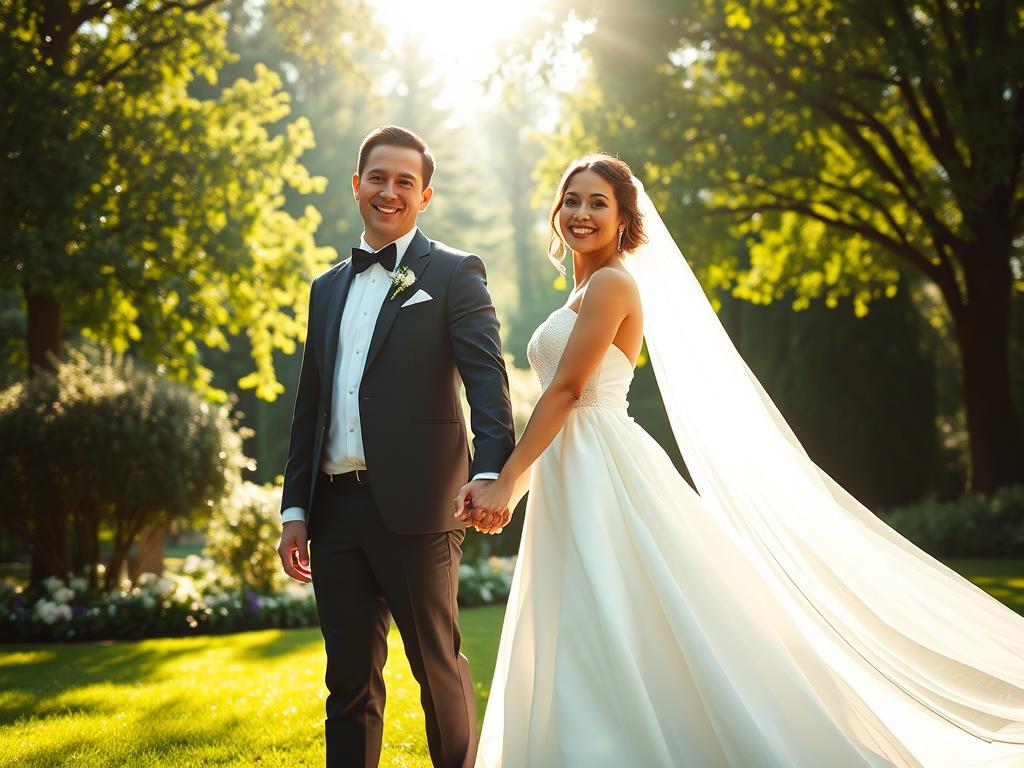
This is your moment. You want images that feel honest and warm, and you deserve a process that removes surprises. I know how it feels to hold that nervous, excited energy the morning of a big celebration.
Plan with care: charge batteries, clear memory cards, clean lenses, confirm the timeline, check routes, and fuel your car. These simple acts keep the day calm and let you live in the moment.
You’ll learn a clear, repeatable approach that blends dependable prep with creative presence. Focus on tone, map the timeline, and come ready to serve your couple with confidence.
By the end, you’ll know how to capture must-have moments—rings, first kiss, portraits, and candid guest time—while keeping the process professional, friendly, and stress-free.
Key Takeaways
- Prepare the night before with batteries, cards, and a clean kit.
- Set intent and timeline so you stay calm and creative on the day.
- Caring about the couple helps you anticipate real moments.
- Balance essential shots with presence and intuition.
- Use a reliable post-day workflow for quick delivery and safe backups.
Understand the search intent: what you want from Wedding Photography
Decide first what success looks like for the images from this celebration. Define whether you aim to tell an honest story, highlight the couple’s personality, or create polished portraits that feel timeless.
Choose a clear style—documentary, editorial, or a balanced mix—and match your coverage, gear, and timeline to that choice. This keeps you focused on one goal at a time and reduces distracting checklists on the wedding day.
- Translate intent into a short creative game plan: which moments matter most and which single technique you’ll improve.
- Make practical promises: list deliverables, turnaround, and album options so clients know what to expect.
- Show the things couples search for—pricing, galleries, reviews—so your site and emails answer questions up front.

Keep your way of working simple. Explain how you’ll guide family shots, coordinate with planners, and handle special requests without over-promising. After the day, review wins and pick one small improvement to practice next time.
Set the tone: caring about your couple makes better photos
Start the day by choosing warmth: a friendly greeting and quick, curious questions build trust fast. Show up early with a genuine smile and learn names; when your couple feels seen, they relax and you capture true energy.
Caring sharpens attention. You’ll notice a proud parent’s tear, a quick glance between the bride groom, or a flower girl’s big moment. Being present helps you frame those tiny, meaningful scenes that matter a lot.
Help reduce stress on the day by reminding them you’re there to assist. Offer water, gentle timing suggestions, and calm direction. Keep prompts light and fun so portraits feel natural.
- Anticipate what matters: heirloom rings, a first look with Dad, or a favorite aunt—be ready.
- Work with vendors: be kind to planners and staff; allies make access and timing easier.
- Follow up fast: send a sneak peek, give a clear delivery timeline, then ask for a review and referrals.

Map the big day: a simple timeline that keeps you on track
Start by anchoring your day to the ceremony time. Work backward from that moment and block realistic slots for getting ready, travel, portraits, family groups, cocktail hour, and the reception.
Part-day vs. full-day coverage: Offer clear options so couples pick what fits their priorities. A part day plan can cover prep, the ceremony, and mini portraits for intimate events. Full-day coverage protects late-night moments and dancing.

Buffer time, travel, and venue logistics in the United States
Build 15–20 minute buffers around each transition. Traffic, elevators, or valet at US venues can delay arrivals, so padding protects your coverage.
- Check GPS and drive time the day before and again the morning of; aim to arrive 5–15 minutes early.
- Confirm venue rules: arrival windows, loading docks, parking, power, and ceremony restrictions, then share a simple plan with the couple and planner.
- Communicate hours clearly and offer overtime options in writing so extending the timeline is stress-free.
Suggest a first look if daylight is tight—it frees time for portraits before guests drift. Coordinate with the officiant and DJ/MC to confirm ceremony length and reception formality so you’re in the right spot when key moments happen.
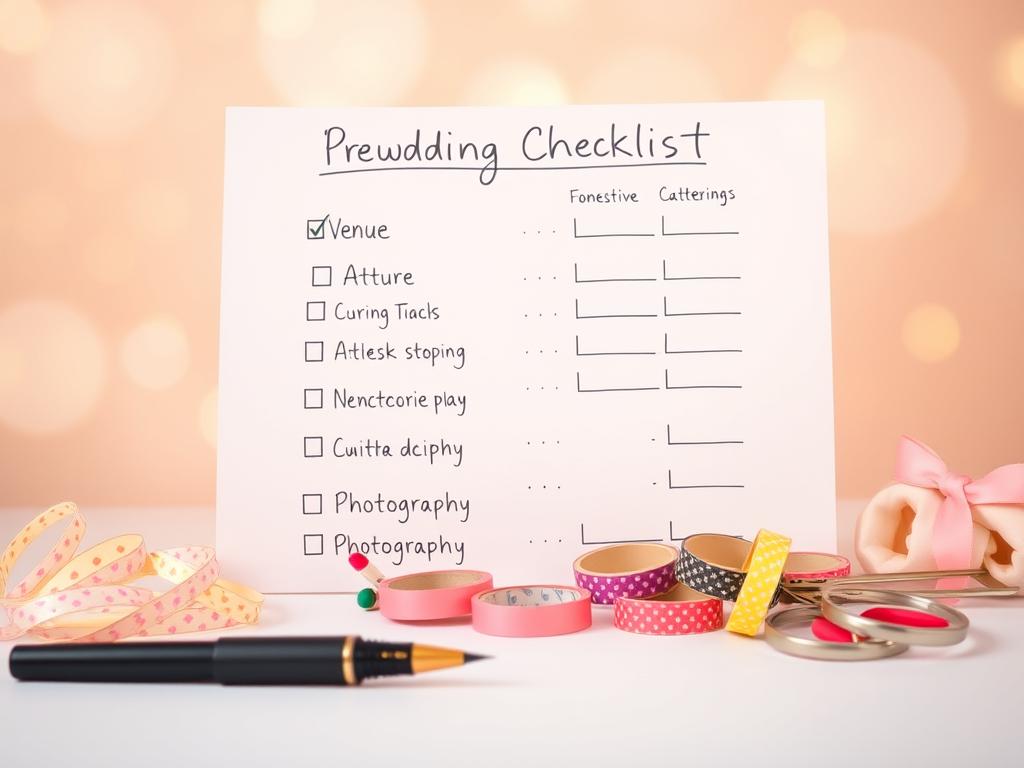
Pre-wedding prep: your stress-free checklist
One tidy checklist the night before saves time and stress on the day. Start with a short routine so you can focus on moments, not problems.
Gear, batteries, cards, and backups: make sure nothing’s missed
Night-before list: charge camera and flash batteries, format memory cards, clean lenses, and pack straps and microfiber cloths.
Verify backup drives and cloud folders. Sync camera clocks and set consistent file naming so culling is smooth.
Shot priorities vs. rigid shot lists: when to memorize and when to let go
Save a short priority note on your phone with ceremony musts, family groupings, and key details. Use it between moments, not during them.
Memorize the critical things, then let presence guide you. A flexible list keeps you responsive to real emotion.
Scouting the venue and ceremony location for light and access
Scout for light, angles, and no-flash rules. Pick shaded or evenly lit spots for group photos and confirm tripod or aisle limits.
- Ask the couple to gather rings, stationery, and heirlooms in one box for quick flat-lays.
- Confirm drive times, parking, and entrance policies so you arrive early and calm.
- Pack redundancy: dual-slot bodies, extra cards, spare batteries, and a simple off-camera light.
Morning of the wedding: arrive fueled, ready, and professional
Start the morning by fueling your body and your plan so you arrive calm, on time, and ready to work.

Eat well and pack smart. Have a hearty breakfast and tuck nuts, granola bars, fruit, and water into your bag. This keeps you energized for long hours without depending on venue breaks.
Dress like a guest-with-a-camera. Choose clean, comfortable clothing that lets you kneel, climb, and blend in. Your look should signal professionalism and respect for the couple and their guests.
- Do a final bag check: batteries, cards, lenses, flashes, straps—everything in place so you start shooting immediately.
- Open your cloud studio app and confirm the day’s timeline, suite numbers, and contact list so you don’t lose time hunting details.
- Text a quick “on the way” ETA to the couple or planner to build trust and calm nerves.
Arrive a few minutes early. Use that one quiet window to assess light, tidy details, and choose a small staging area for your detail shots. If you have a second shooter, touch base on zones and handoffs. Pace yourself, stay hydrated, and keep your phone silent but handy for vendor calls and quick sneak peeks.
Groom coverage: fast rapport and flattering light
Start the groom coverage by finding the calmest room and letting details tell the first part of the story. Walk in upbeat, introduce yourself, and begin with rings, cufflinks, the tie, and the watch while the guys settle in.
Scan for window light first. Position yourself with your back to the window for directional, flattering lighting and quick, confident portraits. Pick a clean wall or doorway—one tidy background beats a cluttered room every time.
Details, getting ready, and quick portraits with clean backgrounds
Capture a short sequence: detail close-ups, the groom with each groomsman, a few hero portraits, and a celebratory “cheers” series.
Keep camera settings consistent and your bag light so you can move fast. If you have a second shooter, assign them to candid family arrivals and detail cutaways while you focus on the groom and party shots.
Natural light, video light, and outdoors: varied looks for the album
Add variety with a moody set: close curtains, kill overheads, and use a small video light for cinematic portraits. Step outside when time allows for walking shots and relaxed group photos.
- Fast priorities: one strong portrait, one group lineup, and a few natural moments if minutes are short.
- Wrap notes: confirm travel time to the ceremony and leave with a couple of hero shots in your pocket.
Bride coverage: details, bridal party, and timeless portraits
Start the bride coverage by arranging small details in one bright spot so you can tell a clear visual story. Gather the dress, shoes, jewelry, and stationery together. Begin with flat-lays that reflect the room’s color and texture.
Master bedroom setup, window light, and bridal portraits
Stage most portraits in the master bedroom—it’s usually clean and bright. Position the bride with her back to the window for flattering, even light. Guide moments like zipping the dress, placing earrings, and a quiet beat for timeless portraits.
Bridesmaids, family combos, and a celebratory “cheers” series
Invite bridesmaids for soft group shots and keep directions simple so smiles stay real. Add a short “cheers” series in the lounge to bring playful energy to the set. Fit quick family combos in while everyone is fresh; confirm names to keep things moving.
- Include a few moody, video-light portraits if time allows for varied images.
- Watch backgrounds—hide clutter and straighten bedding for polished photos.
- Before you leave, secure at least two strong bride portraits, a bridesmaids group, and a candid family frame.
Wedding Photography
Plan your shoot like a short film—simple beats, clear light, and one emotional arc. Treat the job as craft and system so your process makes the whole way feel calm and reliable for the couple.
Keep gear minimal and choices obvious. Use window edges, open shade, or a small video light to shape mood fast. Simple setups let you move and react when unscripted moments happen.
Build each set like an album: several scenes and angles that tell one story without repeating. Match color and contrast across those scenes so the final gallery reads as a single body of images.
- Use one new technique per event to learn without risking key shots.
- Work with planners and DJs so you’re positioned before entrances and speeches.
- Finish with a clear backup and delivery routine that matches your craft with professionalism.
When you keep light, workflow, and care simple, your photos feel effortless and the couple remembers the day—not the problems. A focused approach makes you the photographer they trust.
Ceremony confidence: anticipate moments you can’t repeat
Anticipate the unrepeatable beats of the ceremony so you can capture vows, reactions, and the kiss without scrambling. Arrive early, talk with the officiant about rules, and map your movement so you never block guests yet still get essential shots.
Prioritize your sequence: start with the entrance and the groom’s reaction, then a wide establishing from the back. Move for close-ups during vows and the ring exchange, and grab parents’ reactions and the signing.
Vows, rings, reactions, and the kiss
For the kiss, confirm timing if possible and stand where you see both faces. Take two or three quick frames to reduce blink risk. Keep quiet and small—minimize footsteps and shutter noise during readings.
Low light and color cast: simple settings that work
Use fast primes, raise ISO as needed, and keep shutter speeds steady. Lock white balance or shoot RAW to fix warm church casts later. If space allows, place a second shooter at the back for wide angles while you focus on close-ups from the aisle.
- Stay time-aware—anticipate cues rather than react.
- Capture reaction cutaways to stitch the story together.
- After the recessional, swap lenses quickly for the fast congratulations outside.
Congratulations, group photos, and family photos without chaos
Begin by photographing the scene—wide, emotional frames that show the crowd—before calling families forward.
Capture atmosphere first. As congratulations start, take a few wide shots for context, then move quickly to parents and siblings while hugs still feel fresh. Announce the family photo location and call the immediate family so guests know where to go.
Directing big groups: ladder, voice, and humor
Use a small step ladder and a confident voice to get attention. A short, light joke works better than a long set of instructions. Keep directions brief and upbeat so people respond fast.
Family list flow: efficient combos, counting down, no blinks
Work largest to smallest groups. Call names in order and have a helper stage the next family to cut transition time.
- Place the couple in even light—shaded or backlit—to avoid squinting and harsh shadows.
- Count down 3–2–1 and fire a burst of 3–4 frames to avoid blinks and misalignments.
- Keep a concise family list on your phone so you move fast without being robotic.
Capture a few candid hugs between formal groupings. Thank and dismiss large groups, confirm priority combos, and note the time so you still have a window for couple portraits and bridal party shots.
Couple portraits and locations: variety without losing time
Move with intention: pick locations that give you three distinct looks without long walks. Choose nearby textures—architecture, trees, and a quiet street—so each spot reads different in the final gallery.
Start simple. Open with easy poses and natural prompts to loosen the couple. Then refine small details—hands, posture, chin—to create wall-worthy images fast.
Keep a running clock. Aim for one hero portrait per location and one or two alternates the couple can choose from. This protects golden-hour shots and keeps you on schedule for reception entrances.
Bridal party and transport with personality
Do a quick bridal party set: one classic lineup and one playful prompt that suits the crew and the place. If there’s a special car, stage a few frames that include both vehicle and couple without blocking traffic.
- Pick 2–3 nearby spots with different textures.
- Prioritize a hero shot at each place, then add alternates.
- Watch wind, shadows, and foot traffic; simplify backgrounds.
- Have backups for rain or heat: porches, lobbies, or alleys with good light.
- Keep color treatment consistent so images feel cohesive.
Round out the set with candid transitions—walking hand in hand, laughter between poses—to show movement and emotion. Confirm time with your planner or DJ before you head to the reception so you don’t miss entrances.
Reception storytelling: details, speeches, first dance, and party
The party portion of the day reveals candid moments that make your final images sing.
Start by photographing the room before guests arrive. Capture tables, centerpieces, and the cake as clean hero images. Revisit those details later with people in the frame for a richer story.
Room details and cake with context
Shoot wide establishing views, then get a tight hero of the cake. Add 2–3 context frames showing the couple and guests near the table so the décor feels lived-in.
First dance lighting and dance floor energy
Decide on one lighting approach and stick with it. Use on-camera bounce or a small off-camera setup for consistent mood. Start wide to show the floor, then move in for close emotional shots—laughs, spins, and tears.
- Position for speeches with clean backgrounds and capture couple reactions.
- Ask the DJ about confetti or sparks so you can plan safe angles and exposures.
- If you end coverage after the first dance, confirm any must-have moments first and thank the coordinator and DJ before you pack up.
Keep it simple: gear choices that serve your vision
Pick gear that helps you move fast and keep your focus on people, not on complex setups. A lean bag lets you stay present and friendly while you work the room.
“Gear is good but vision is better.”
"Gear is good but vision is better."
Two camera bodies with complementary lenses—think 35mm and 70–200mm—cover most shots and keep you quick. Make sure your cameras are dual-slot so you get instant backups if a memory card fails.
Favor repeatable lighting: window light, a small on-camera bounce, or one compact off-camera LED. Pack only the things you’ll actually use: extra batteries, cards, a small LED, and a reflector.
- Standardize settings for prep rooms, ceremony, and first dance.
- Calibrate focus and practice switching bodies fast.
- Try get comfortable with one new technique per event without overcomplicating the day.
Keep straps comfortable and your harness adjusted—your energy shows in how you interact. End the night with a quick gear reset so backups and culling start smoothly when you get home.
Learn about light: see it, shape it, and solve problems
See light as a tool: its color, angle, and strength change everything fast. Train your eye to spot direction, softness, color cast, and intensity so you place people in the best spot for the shot.
Indoors, find window edges and position the subject with your back to the window for soft, flattering falloff. Use doorways and curtains to flag light without adding gear.
Outside, favor open shade or gentle backlight. Expose for faces and watch for hot spots on skin. In warm churches, decide whether to keep the tungsten glow or correct white balance later—be consistent across the ceremony.
At receptions, pick one simple lighting plan—bounce flash or a single off-camera LED—and stick with it so you stay present for moments.
- Set reliable baseline settings for prep, ceremony, and dance floor scenarios.
- Catalog venue spots—stairs, porches, hallways—for quick pivots.
- Practice one lighting skill each event to build fast competence.
"Learn to see light; the better you read it, the better your images will feel."
Create a “must-remember” list of photo ideas without over-scripting
A tiny, flexible list helps you catch the essentials and stay free to respond to real moments. Keep this list short enough to fit on one screen so it helps, not hinders.
Must-capture details: stationery, rings, shoes, veil, bouquet, and table décor. These small items anchor the story and feed a strong wedding album later.
Ceremony and exit
Note aisle energy before and during, parents’ reactions, the kiss, the signing, and the joyful exit with confetti, bubbles, or sparklers. Make sure you’re in place for the unrepeatable beats.
Reception highlights and creative shots
Capture the room reveal, table décor with people, cake hero + cutting, first dance, and two or three dance-floor frames that tell a mini-story.
- Keep the family list as a quick checklist only.
- Flag album-minded scenes by shooting varied angles of the same moment.
- Note one or two creative ideas—reflection frames, a motion-blur portrait, or a legal drone overview—without over-scripting the flow.
Final tip: ask the couple about heirlooms or surprises early. Try get those shots first and then spend the rest of the day reacting to life. A short list lets you take photos that are both planned and honest.
Client experience that grows your business
Fast, clear follow-up builds trust and turns one booking into several referrals. Your post-day process is a big part of the client experience and can be a major driver of new work.
Timely delivery, sneak peeks, and asking for reviews
Set clear delivery timelines in your contract and then beat them. Couples remember speed and consistency—stick to your stated time and you’ll build word-of-mouth momentum.
Send a small sneak peek within 24–48 hours to capture excitement. Deliver it by email or text if you avoid social platforms.
Ask for reviews with one-click links and a short, friendly note. Make it effortless for the couple to praise your work.
Referrals, simple incentives, and staying responsive
Offer modest incentives—print credits or a discount on a future session—and track what actually brings referrals.
Reply to client messages the same day. If edits take longer, send a helpful status update so they feel informed.
- Provide a warm onboarding packet: welcome guide, timeline help, and a short family list tip sheet.
- Share favorite shots with vendors and tag them in blog posts to reinforce partnerships.
- Celebrate clients—anniversary notes or small greetings keep relationships alive.
"Quick, thoughtful service turns great photos into lasting referrals."
Make sure your workflow protects turnaround times: batch edits, presets, or selective outsourcing can help as your calendar fills.
After the wedding: backup, cull, edit, deliver
Protect the day’s images immediately by offloading cards and verifying files before anything else. Make it a rule: copy cards to your primary drive, verify checksums, then clone to a second drive before you format cards.
Immediate uploads and safe storage
Organize cards by camera and by part of the day to keep sequences intact. This speeds culling and helps you find ceremony and reception details later.
Keep RAWs on two drives until the project is delivered and archived to long-term storage. Your risk tolerance for weddings should be low.
Batch workflows and speedy previews
Start with a quick star-pass to flag strong frames, then refine selects. Synchronize white balance and exposure across similar scenes for a consistent look.
Deliver a short preview gallery fast to feed excitement, then follow with the full gallery on or before your promised time.
Album planning and closing the project
Flag album-friendly images—ceremony location, décor, and hero moments—and suggest a first-draft spread that reads well across pages.
- Use simple folder names and a repeatable file structure.
- Create a separate “party highlights” set if you shot a lot of dance-floor energy.
- Archive, invoice upgrades, and send a thank-you that invites referrals.
"A fast, dependable workflow turns great photos into a smooth client experience."
Conclusion
Finish the day with a clear process that protects your work and honors the couple’s story. Pack and power down calmly, offload cards to two safe locations, and note any must-fix frames before you leave the venue.
Make sure you confirm delivery timelines with the couple and set one small follow-up—an online sneak peek or a thank-you note—that keeps momentum and goodwill alive.
Keep your gear simple and your light choices consistent so you can focus on the real moments that make a great photo. Choose one tiny improvement to practice next time; small gains add up fast.
Close the loop with clear next steps for albums or prints, ask vendors for mutual shares, and invite reviews. This reliable way of working turns strong craft into repeat bookings and happy referrals for the photographer.
FAQ
How do I choose between part-day and full-day coverage?
Think about the moments you can’t miss. If you want getting-ready shots, ceremony, portraits, and reception highlights, full-day coverage is safest. For a shorter, budget-friendly option, part-day usually covers the ceremony and portraits. Discuss start and end times, travel between venues, and buffer time so your photographer can capture everything without rushing.
What should be on my pre-wedding checklist to make sure photos go smoothly?
Confirm your timeline, share a short shot priority list, and provide vendor and venue contact info. Pack a kit with extra batteries, memory cards, and basic touch-up items. Do a quick venue scout or share photos of key rooms and window light so your photographer can plan lighting and locations.
How much time should we plan for couple portraits without losing reception time?
Aim for 20–40 minutes for a focused portrait session at one or two nearby spots. That delivers a variety of looks without taking guests away from the party. If you want multiple locations or extended creative portraits, build in extra time earlier in the day or during a formal portrait window.
What should we expect the morning of the wedding from our photographer?
Your photographer will arrive ready to work, usually with spare gear and a plan. They’ll capture details like rings and invitations, getting-ready moments, and candid interactions. Keeping a calm schedule, snacks, and a clean space with good window light helps get flattering images early on.
How do you handle low light during ceremony and reception to get reliable images?
Your photographer will use fast lenses, higher ISO settings, and appropriate shutter speeds to preserve ambient mood. They may add subtle off-camera or on-camera light when necessary to avoid harsh shadows. Talk about your venue’s lighting and any restrictions so they can prepare.
What’s the best way to organize group and family photos to avoid chaos?
Create a simple family list in order, designate a point person to gather relatives, and start with large groups then move to smaller combos. Your photographer will use clear directions, keep people moving, and count down to capture blinking-free shots efficiently.
How far in advance should we scout locations for portraits and lighting?
Ideally a visit a few weeks before the day gives time to test light, plan backdrops, and choose photo-friendly spots at your venue. If that’s not possible, share photos or Google Street View links so your photographer can prepare lens choices and timing for the best light.
What backup systems are used after the event to keep images safe?
Images are immediately copied to at least two separate drives and uploaded to cloud storage for redundancy. Professionals also implement cataloging and batch workflows to cull and edit efficiently while maintaining secure backups throughout the process.
How do you prioritize “must-have” shots without following a rigid shot list?
Provide a short list of non-negotiable moments and key family combos, then trust the photographer to read the day and capture organic moments. This balance ensures you get essential images while allowing natural interactions to create memorable, candid photos.
What should we know about album planning and delivery timelines?
Most photographers offer a preview gallery within days and a full gallery in 4–12 weeks depending on season and edits. Album design typically begins after you review images; expect drafts, revisions, and a production window. Ask about physical proofs, paper options, and estimated delivery so you can plan gifting and display.


0 Comments